Crochet: Butterfly, Flower & Leaf {Pattern & Tutorial}
April 12, 2011 | 9 Comments


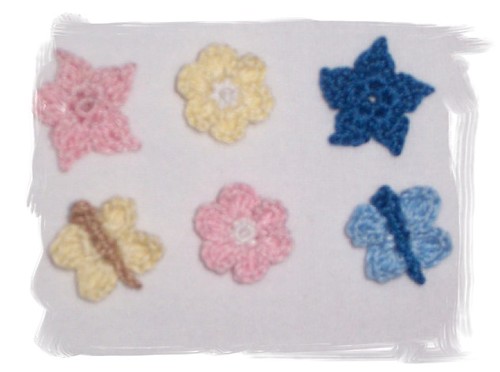
I love making small ornaments for embellishment and here are the Spring motif crochet patterns of butterfly, flower and leaf. Since they only have 2 rounds of crochet, thus, they are pretty simple and quick to make. You can use stash yarns or lace threads of various colors to crochet, the finished size depends on what kind of yarn or lace thread you used. I used lace thread and DMC perle cotton #8 which are the stashes from my previous projects of crochet bead necklace and lace trim handkerchief. The lighter / thinner the yarn or thread you use, the smaller the finished piece will be if crochet with a matching hook size.
Butterfly, flower & leaf are popular embellishment. They are great to put onto many things apart from those I have made here. Just a suggestion, the flower bouquet shown on the photo frame can be put on bags, notebook cover etc. The next thing I could think of would be a card for mommies for the upcoming mother’s day, or, a greeting card for any occasion. Also, instead of clothes pin & hair clips, what about make it for hair bands, ear rings, necklace pendants, rings? Not to mention about the flower brooch, there are so many ways to use it…. I pinned it on my dolly lampshade.
Hair clips are my daughter’s favorite, so I made a pair of flower + butterfly for her. I think the next thing she would want from my crafty hands are ear rings and hair band
Get the details on how to crochet them after this jump:

Difficulty Level: Beginner, must know how to crochet ch, sc, dc, tr & slst.Materials & Tools:
For crochet butterfly, flower & leaf
1. DMC perle cotton thread #8 (double strand) or cotton lace thread #20, various colors
2. Crochet hook: 1.5 mm
3. Tapestry Needle # 22
4. ScissorsOthers
5. Sewing kits
6. Hot glue gun
7. Photo frame, felt or photo, Burlap / hemp cloth, ribbon
8. Clothes pin
9. Hair clips
10. Brooch pin & small piece of feltAbbreviations:
ch = chain
sc = single crochet
dc = double crochet
tr = treble or triple crochet
st = stitch
slst = slip stitch [see important note]
sl knot = slip knot
fo = fasten offIMPORTANT NOTE: if not specify where to do the tr, dc or slst, do it on the same st.
The color inside { } is only for the pattern reference, you can mix and match what ever colors you want and get some surprises with your creation.
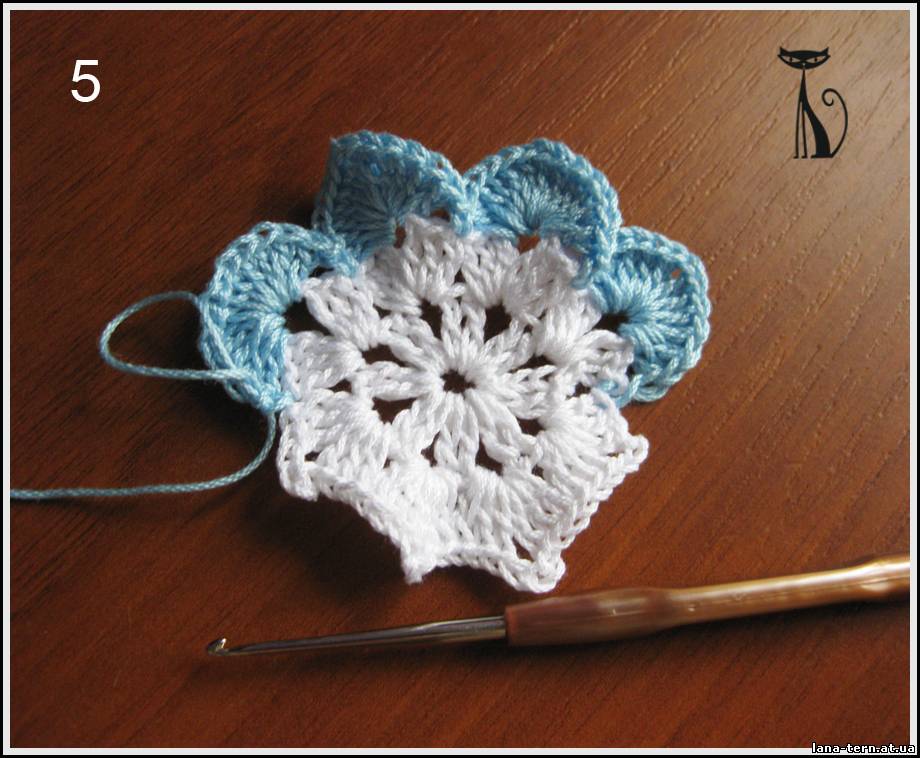
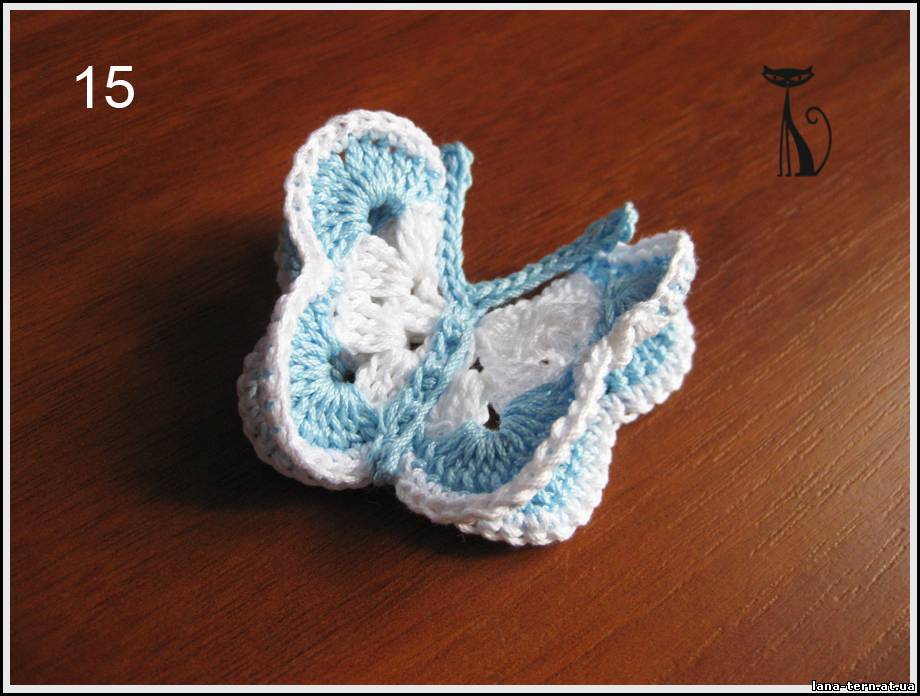
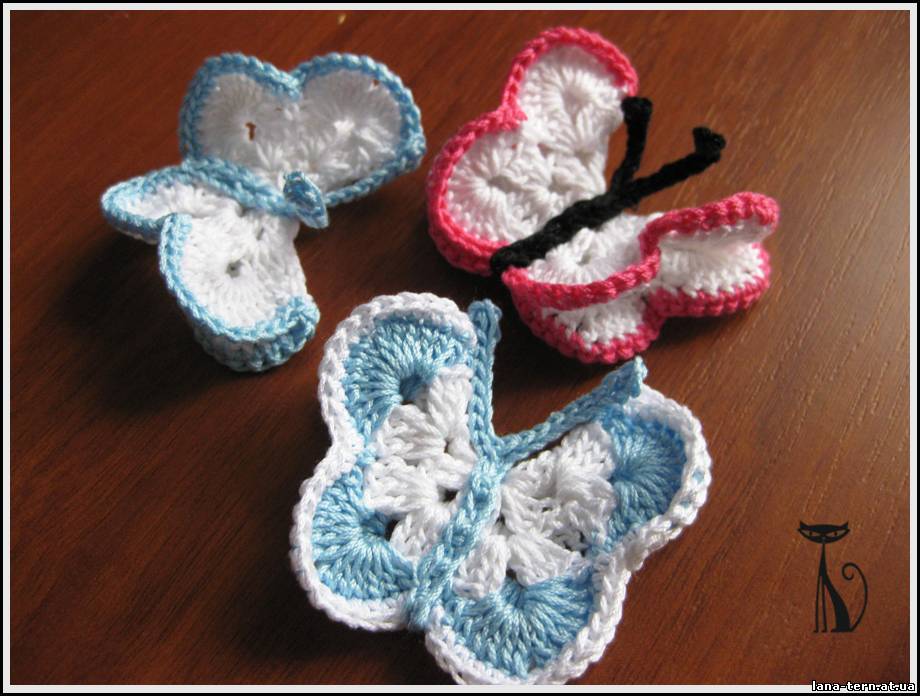
 Butterfly Crochet Pattern:
{blue} Begin with a sl knot of approx 3″ tail.
r1 – ch2, sc6 on 2nd st from hook, slst to the first ch to make a ring.
{yellow} Insert the hook at the last st of r1, yarn over to make a loop as the beginning st of r2.
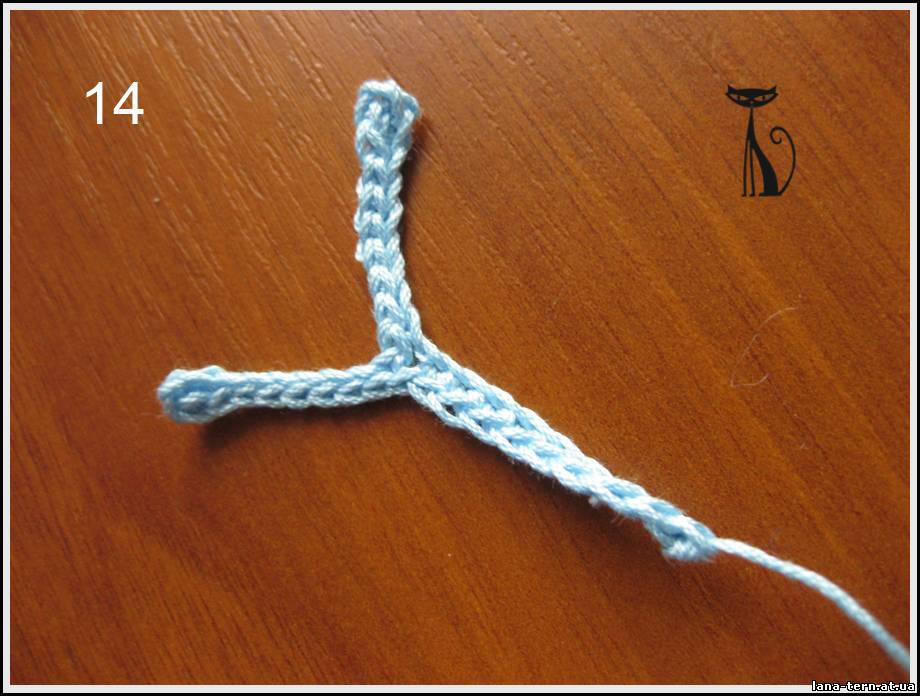
r2 – [forewing: slst on next st, ch4, tr2, tr1 on next st, ch4, slst.] [hindwing: *slst on next st, ch3, dc, [tail: ch3, slst on the loop of dc st], ch3, slst, repeat * 2 times.] Repeat forewing pattern to complete the butterfly. fo & leave approx. 3″ to make antennae.
[Antennae] Tie 2 yarn ends to make a knot, trim away excess yarn. Repeat the same for the other antennae.
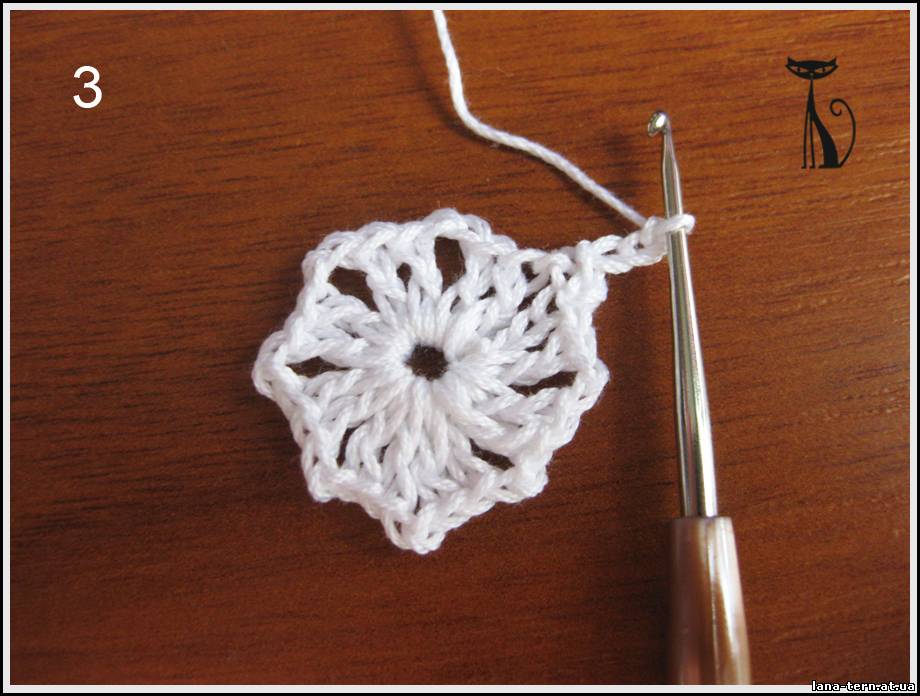
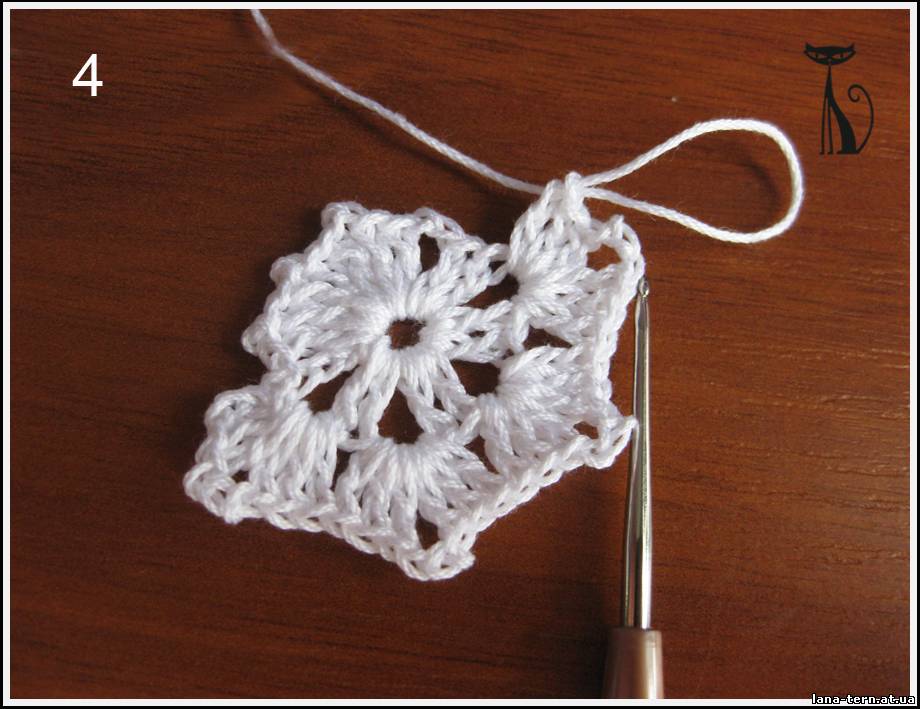
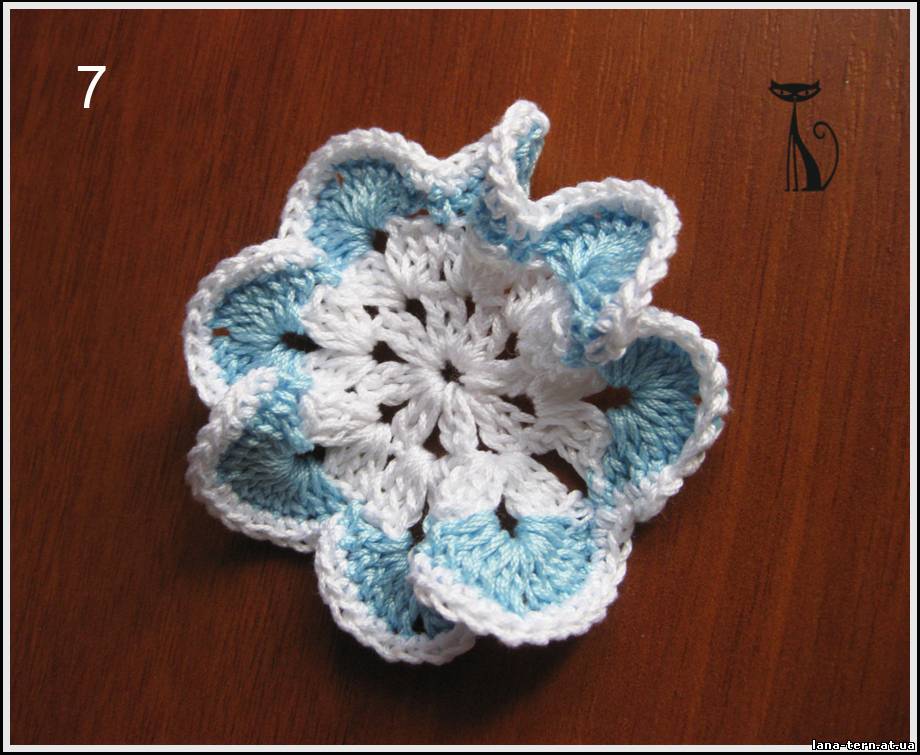
 Flower Crochet pattern:
{white} Begin with a sl knot of approx 3″ – 4″ tail.
r1 – ch2, sc6 on 2nd st from hook, slst to the first ch to make a ring.
{orange pink} Insert the hook at the last st of r1, yarn over to make a loop as the beginning st of r2.
r2 – *slst on next st, ch3, dc, ch3, slst, repeat * 6 times to make 6 petals. fo & leave approx. 3″ – 4″ tail
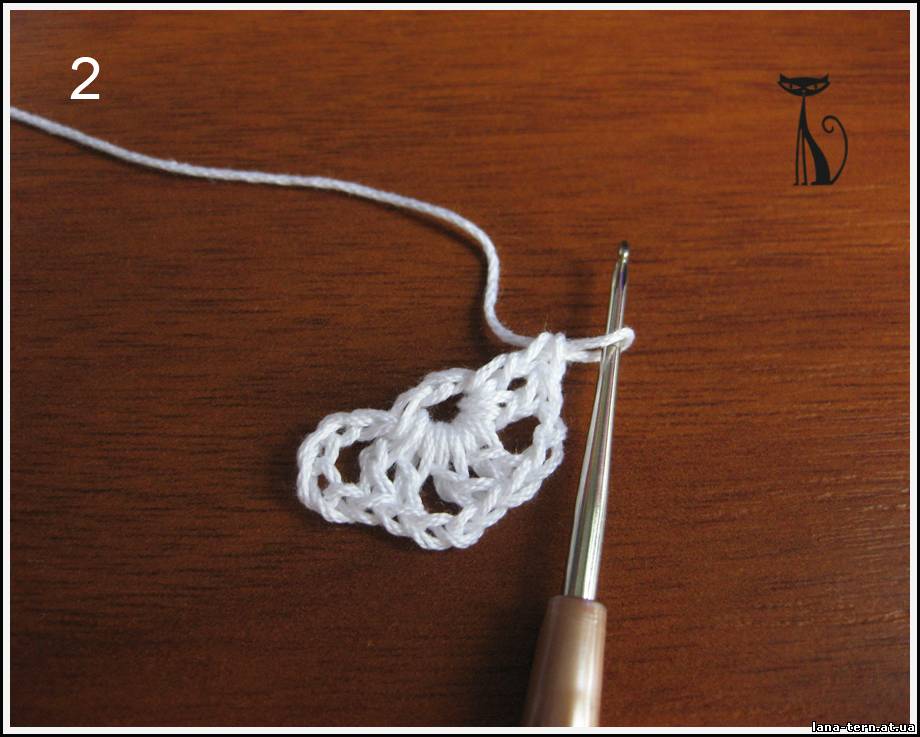
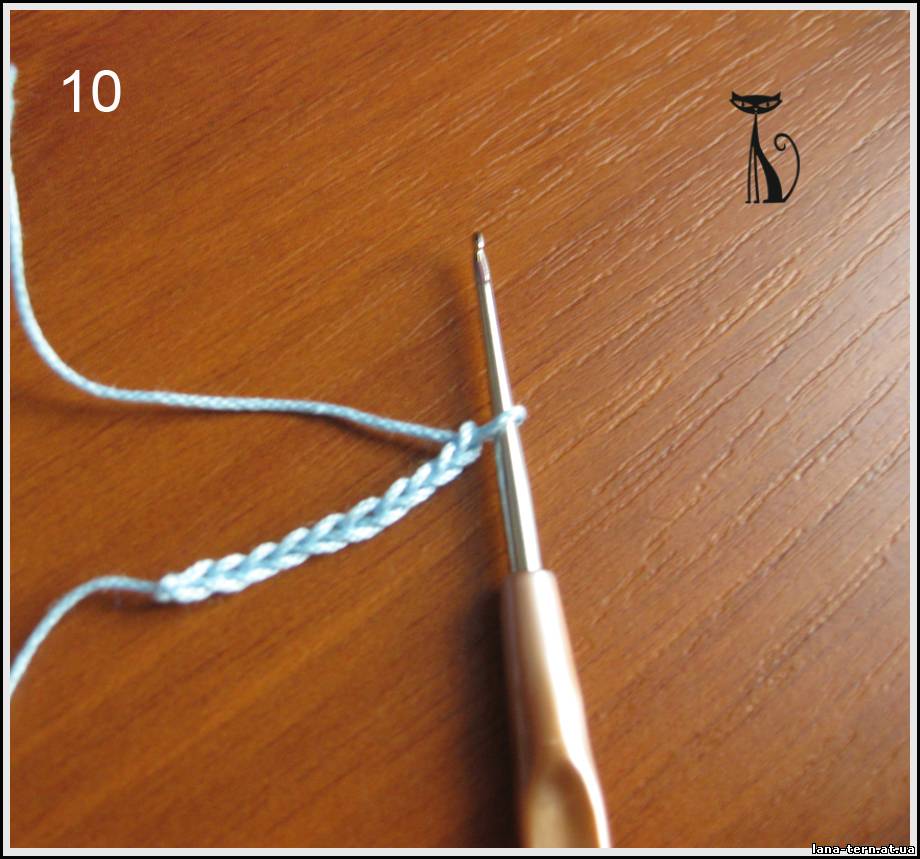
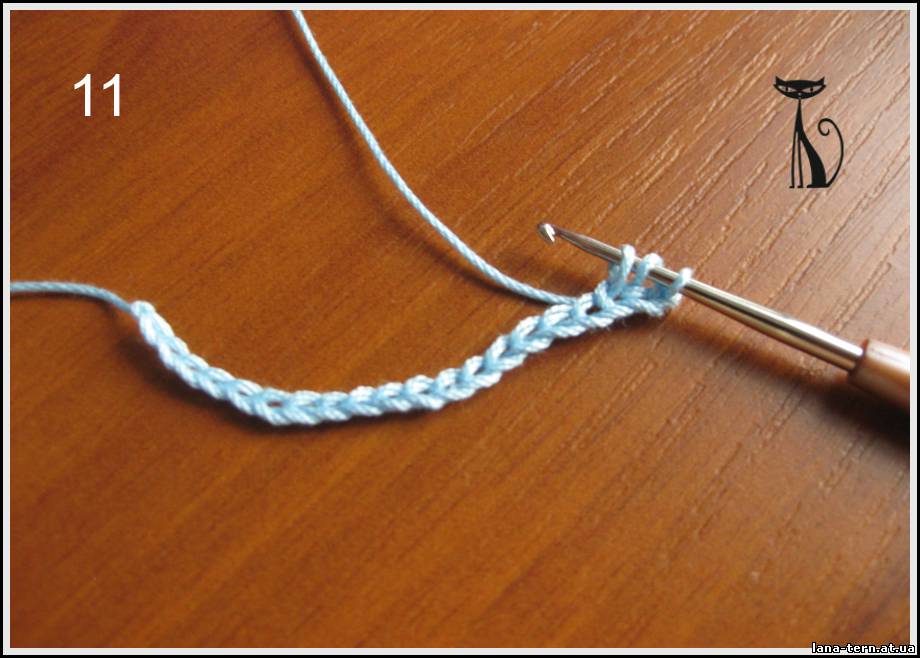
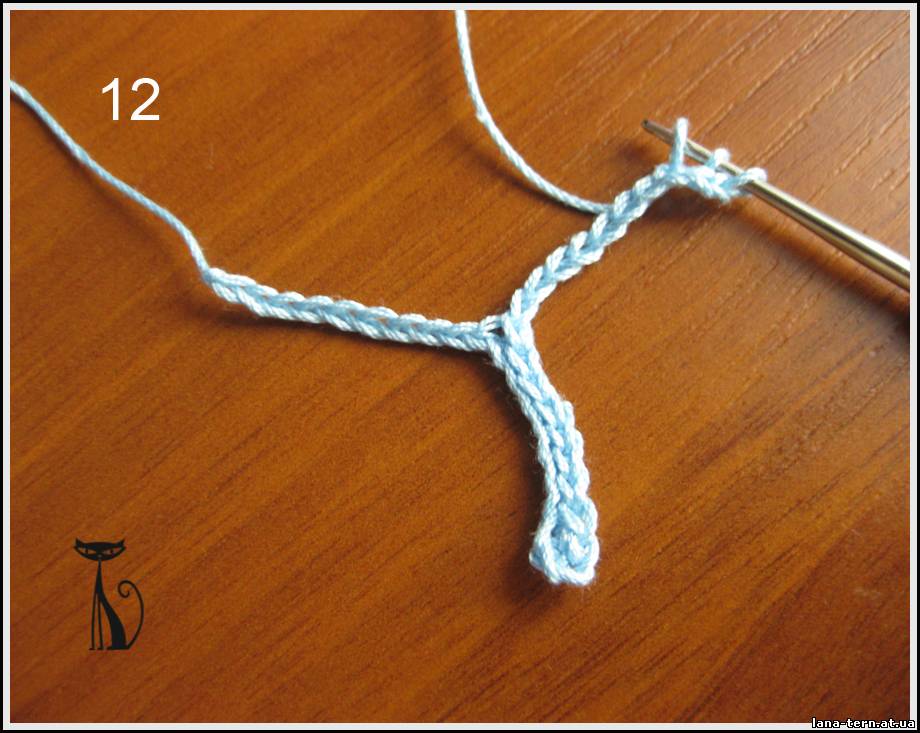
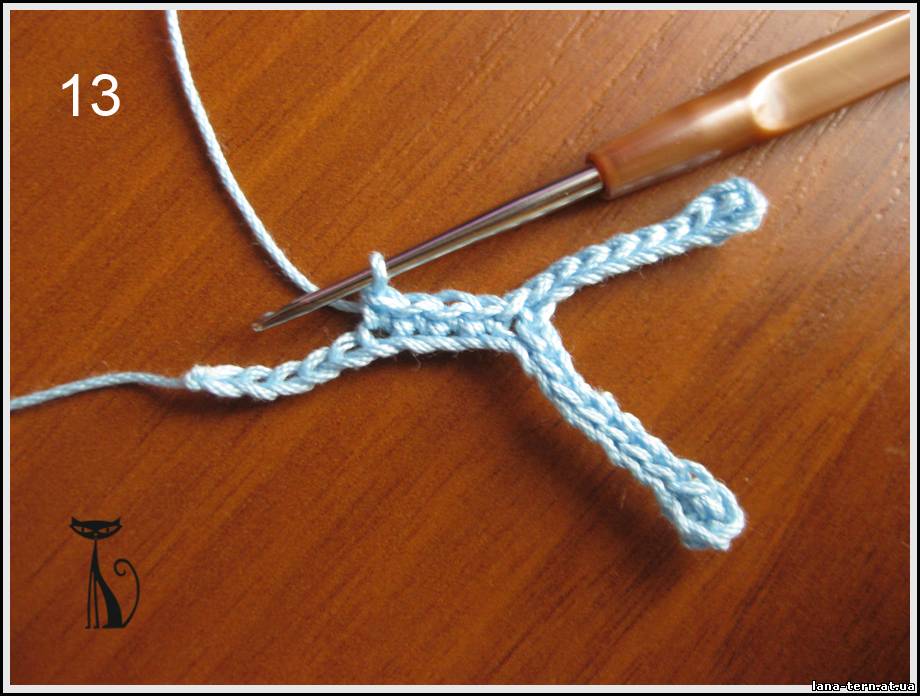
 Leaf Crochet Pattern:
{green} Begin with a sl knot of approx 4″ tail.
r1 – ch9.
r2 – sc1 on the 2nd st from hook, hdc1, dc3, hdc1, sc1, slst on the last ch st, turn and work on the other loop of the base ch. ch1, slst on 1st st, sc1, hdc1, dc3, hdc1, sc1, slst. fo & leave approx 4″ tail.
Use tapestry needle to bring the yarn end to the starting side of the leaf through midrib.
 Plan your design and determine the quantities and colors of each butterfly, flower & leaf you need for your project.
 For Photo Frame:
Cut burlap or hemp cloth and fringe the edges by removing a few warps’ and wefts’ thread.
Position the flowers and leafs, secure them with pin.
Sew or glue them with hot glue. I prefer sew because the burlap could be too weak to hold the flower in place with glue.
 Tie a ribbon and sew it on the “stems” of the flowers and leafs.
position & glue the motif on the felt or photo’s plastic cover or on the frame of your photo frame.
If you want to put photo in the frame, position the motif away from the main display area so that it won’t block your beautiful photo. Glue some butterflies and flowers to decorate.
 For Clothes Pin & Hair Clips:
Make a knot on the yarn tails at the back of the crochet flower, trim away the excess yarn but not too near to the knot. Glue the flower on the clothes pin with hot glue.
Do the same to hair clip, hair barrette, bobby pin, hair claw, hair band, bun holder etc…
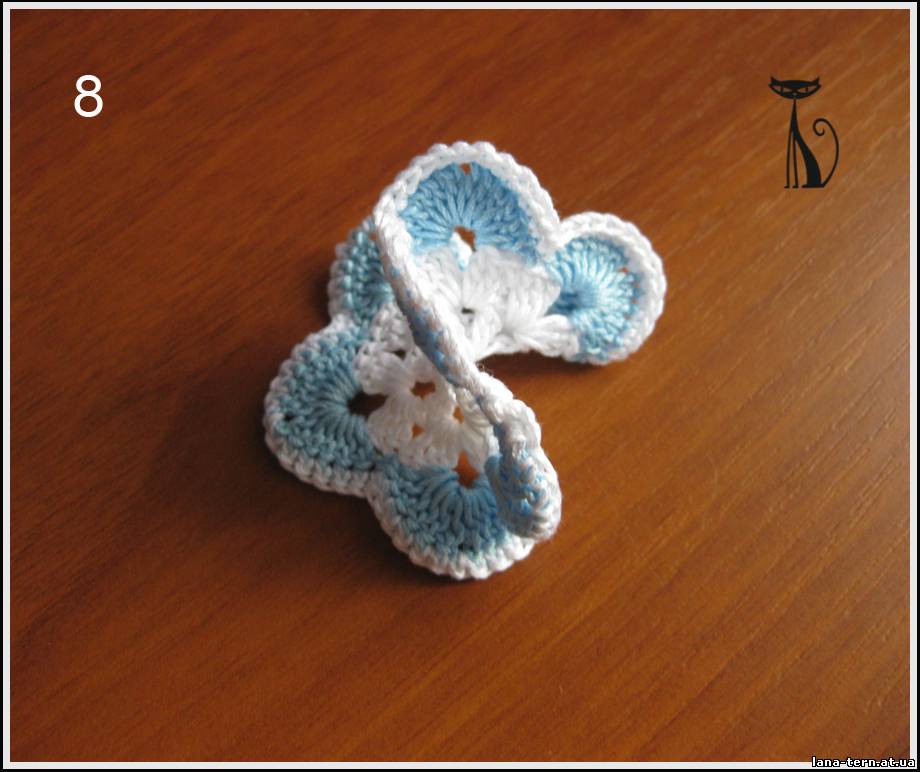
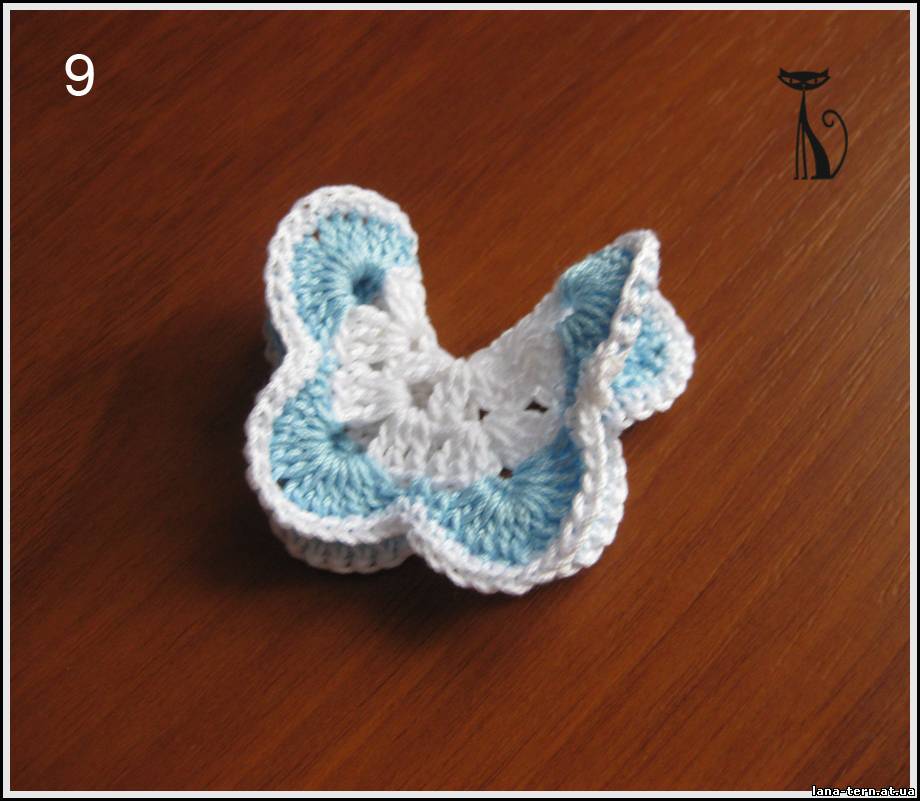
 For Flower Bouquet Brooch:
Crochet 8 flowers, sew them together from behind and minimize the appearance of stitches in front. Use similar sewing thread color to camouflage the stitches within the bouquet just in case they did showed up on the front.
Take 2 yarns from behind to the front and tie a knot to secure the “stems” in place just like a flower bouquet.
 A brooch pin and a small piece of felt enough to cover the back of the pin.
 Sew brooch pin to the back of the flower bouquet, again, try not to show any stitches in front.
 Cover the back of the brooch pin with a small piece of felt either by gluing or by sewing along the edges. http://www.craftpassion.com/2011/04/crochet-butterfly-flower-leaf-pattern-tutorial.html
Butterfly Crochet Pattern:{blue} Begin with a sl knot of approx 3″ tail.
r1 – ch2, sc6 on 2nd st from hook, slst to the first ch to make a ring.
{yellow} Insert the hook at the last st of r1, yarn over to make a loop as the beginning st of r2.
r2 – [forewing: slst on next st, ch4, tr2, tr1 on next st, ch4, slst.] [hindwing: *slst on next st, ch3, dc, [tail: ch3, slst on the loop of dc st], ch3, slst, repeat * 2 times.] Repeat forewing pattern to complete the butterfly. fo & leave approx. 3″ to make antennae.
[Antennae] Tie 2 yarn ends to make a knot, trim away excess yarn. Repeat the same for the other antennae.
Flower Crochet pattern:{white} Begin with a sl knot of approx 3″ – 4″ tail.
r1 – ch2, sc6 on 2nd st from hook, slst to the first ch to make a ring.
{orange pink} Insert the hook at the last st of r1, yarn over to make a loop as the beginning st of r2.
r2 – *slst on next st, ch3, dc, ch3, slst, repeat * 6 times to make 6 petals. fo & leave approx. 3″ – 4″ tail
Leaf Crochet Pattern:{green} Begin with a sl knot of approx 4″ tail.
r1 – ch9.
r2 – sc1 on the 2nd st from hook, hdc1, dc3, hdc1, sc1, slst on the last ch st, turn and work on the other loop of the base ch. ch1, slst on 1st st, sc1, hdc1, dc3, hdc1, sc1, slst. fo & leave approx 4″ tail.
Use tapestry needle to bring the yarn end to the starting side of the leaf through midrib.
Plan your design and determine the quantities and colors of each butterfly, flower & leaf you need for your project.For Photo Frame:Cut burlap or hemp cloth and fringe the edges by removing a few warps’ and wefts’ thread.
Position the flowers and leafs, secure them with pin.
Sew or glue them with hot glue. I prefer sew because the burlap could be too weak to hold the flower in place with glue.
Tie a ribbon and sew it on the “stems” of the flowers and leafs.position & glue the motif on the felt or photo’s plastic cover or on the frame of your photo frame.
If you want to put photo in the frame, position the motif away from the main display area so that it won’t block your beautiful photo. Glue some butterflies and flowers to decorate.
For Clothes Pin & Hair Clips:Make a knot on the yarn tails at the back of the crochet flower, trim away the excess yarn but not too near to the knot. Glue the flower on the clothes pin with hot glue.
Do the same to hair clip, hair barrette, bobby pin, hair claw, hair band, bun holder etc…
For Flower Bouquet Brooch:Crochet 8 flowers, sew them together from behind and minimize the appearance of stitches in front. Use similar sewing thread color to camouflage the stitches within the bouquet just in case they did showed up on the front.
Take 2 yarns from behind to the front and tie a knot to secure the “stems” in place just like a flower bouquet.
A brooch pin and a small piece of felt enough to cover the back of the pin.Sew brooch pin to the back of the flower bouquet, again, try not to show any stitches in front.Cover the back of the brooch pin with a small piece of felt either by gluing or by sewing along the edges. http://www.craftpassion.com/2011/04/crochet-butterfly-flower-leaf-pattern-tutorial.html